Playlist
Show Playlist
Hide Playlist
Nuclear Medicine: HIDA and VQ Scan

-
Slides DLM Nuclear Medicine.pdf
-
Download Lecture Overview
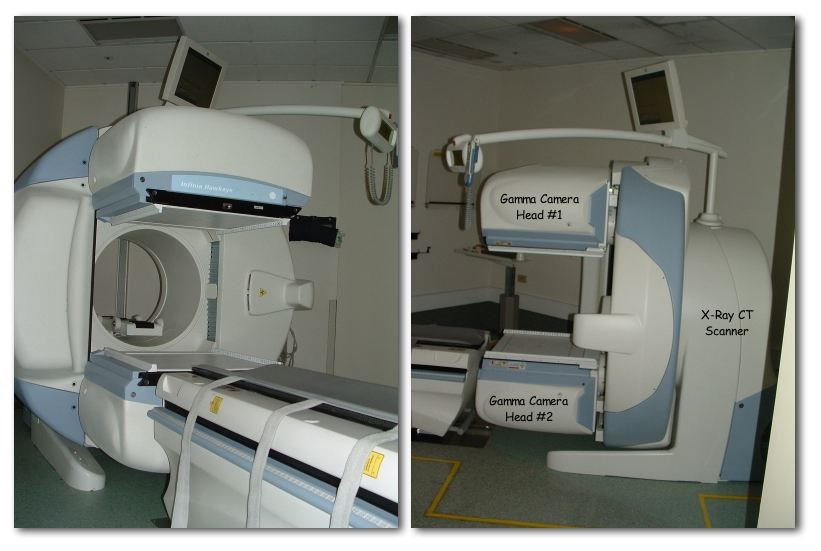
00:01 So in this lecture we'll be discussing nuclear medicine. 00:03 We'll talk about how nuclear medicine is different from the rest of radiology. 00:07 And we'll review some common nuclear medicine examinations and some common uses for those examinations. 00:12 So Nuclear medicine is different from the rest of radiology because it's the type of functional imaging. 00:19 What that means is that it provides information on the physiologic functioning of an organ rather than simply providing an anatomical image. 00:27 So what is a radioisotope? Let's go over some basic nuclear medicine terminology. 00:33 A radioisotope is an unstable form of an element that releases radiation as it decays into a stable form. 00:39 A radiopharmaceutical is an artificially produced radioisotope that is bound to a pharmaceutical which allows it to concentrate within the specific targeted organ. 00:49 Gamma decay is what is used in nuclear medicine. 00:52 That's the emission of energy in the form of electromagnetic radiation from an unstable nucleus. So in nuclear medicine, this energy is detected by a gamma camera which then measures this energy and forms an image. 01:04 So this is an example of nuclear medicine image. 01:11 Nuclear medicine images are actually low sensitivity. 01:14 They have about a centimeter of resolution and that's why they're not really used specifically for anatomical purposes. 01:19 They're really used more for physiologic purposes. 01:22 They can be both static or dynamic. 01:24 SPECT is the type of nuclear medicine examination and that stands for Single Photon Emission Computed Tomography. 01:31 It means that multiple 2D images are acquired at different angles and they are used to create a 3D picture. 01:38 So there are many different types of nuclear medicine examinations than many different uses of nuclear medicine in general. 01:44 We're going to review some of the most common ones. 01:46 And that includes a HIDA scan, a VQ scan which is used for the lungs, a bone scan, a cardiac scan which can be used for multiple purposes of heart imaging and then a thyroid scan. 02:01 So let's go into each of these in a little more detail. 02:03 So HIDA scan is also called Cholescintigraphy. 02:06 It's an examination of the gall bladder. 02:08 The radioisotope that's used is Technetium-99m which is a very commonly used radioisotope in nuclear medicine. 02:15 The radiopharmaceutical that's used is called iminodiacetic acid and that helps concentrate the radioisotope within the biliary system and the gall bladder. 02:24 So HIDA scan is used when there is the clinically suspected case of acute cholecystitis but the ultrasound findings are equivocal. 02:32 So if the patient come in with upper right quadrant pain, and you're suspecting an acute cholecystitis, the first examination that's performed is an ultrasound. 02:39 However, if the findings from the ultrasound are equivocal, we then move on to performing a HIDA scan. 02:45 And that gives us a better answer as to what maybe going on. 02:48 So the iminodiacetic acid binds to protein which is then taken up by the liver and then is excreted. 02:56 So it's a similar excretion process as bile. 02:58 Some normal imaging findings with the HIDA scan are at ten minutes after radiotracer injection. 03:06 We see the bile ducts and that tells us that there's normal hepatic function. 03:12 So this examination is performed at multiple stages after the administration of intravenous radiotracer. 03:18 At about 30 to 60 minutes, you would see normal filling of the gall bladder which tells us that the cystic duct is patent. 03:27 And approximately at the same time but maybe a little bit later than that, we then see radiotracer entering the duodenum and that tells us that the common bile duct is patent. 03:36 So each of these three areas should be visible after the administration of the radiotracer. So let's take a look at an example. 03:43 This is a normal HIDA scan. You can see normal activity within the intrahepatic ducts right here and you see normal activity within the gallbladder, as well as the small bowel here. 03:56 This is normal activity that seen within the liver. 03:59 So this is an image essentially of the right upper quadrant of the abdomen and this is what a normal HIDA scan would look like. 04:06 So let's take a look at an example of acute cholecystitis so we have normal filling of the intrahepatic bile ducts. 04:13 We have normal activity within the liver. 04:16 And then we have normal activity within the small bowel. 04:20 However, there's no activity within the gall bladder which should be right about here. 04:25 So this is an example of what an acute cholecystitis would look like. 04:29 So now let's discuss VQ scans. 04:32 A VQ scan is a ventilation perfusion scan and it's used to detect pulmonary embolism. 04:38 There are two different parts to a VQ scan. 04:41 There's a perfusion part and then there's a ventilation part. 04:44 So for the perfusion part, the radioisotope that's used is Technetium 99-m and the radiopharmaceutical which helps take the radioisotope into the blood vessels is macroaggregated albumin or MAA. 04:56 For the ventilation part again it's the same Radioisotope Technetium 99-m which is a very commonly used radioisotope. 05:03 And the radiopharmaceutical is an aerosol such as xenon or krypton. 05:08 When a patient comes in with suspected pulmonary embolism, really the modality of choice is a CT pulmonary angiogram. 05:16 However, there are certain patients that can't undergo a CT and those are the patients that would end up having a VQ scan. 05:21 For example a patient that has an allergy to intravenous contrast really can't undergo a CT pulmonary embolism study. 05:28 And so a VQ scan would be the modality of choice in these patients. 05:32 Whenever we're doing a VQ scan we should always obtain a chest radiograph first prior to doing a VQ scan. 05:40 And we wanna exclude any kind of consolidation which may result in a false positive. 05:44 So the perfusion again is performed by macroaggregated albumin and that's injected intravenously and enters the pulmonary vasculature. 05:53 For the ventilation portion, the patient actually breathes the aerosol which is technetium labelled and that enters the lung parenchyma. 06:01 This is an example of a normal VQ scan. 06:05 So there's normal perfusion which is uniformly taken up within the lungs and you can see normal areas of photopenia in the region of the heart and the hila which is right here centrally. 06:17 The normal ventilation scan shows homogenous radiotracer are washing into the lungs. 06:25 So you really shouldn't have any defects of perfusion. 06:27 The entire lung should essentially be outlined except for the part that's surrounding the heart. 06:32 If there's a pulmonary embolism that produces a mismatch in which there's preserved ventilation but a lack of perfusion to that area. 06:39 So there are different categories of VQ scans depending on what the suspected abnormality is for pulmonary embolism. 06:46 So you can have a normal VQ scan, you can have low probability VQ scan, you can have an intermediate probability VQ scan or a high probability VQ scan and this again tells you what the probability is of having a pulmonary embolism. 07:03 So with the VQ scan, and there really is no definite yes or no and that's why a CTA is usually the modality of choice but there is a probability. 07:11 So if a patient has a high probability, then essentially that means yes, they probably do have a pulmonary embolism. 07:16 If it's a normal study, then it's essentially taken that the patient definitely does not have a pulmonary embolism. 07:22 With the intermediate you kind of have to look at the clinical situation and decide how suspicious you are. 07:27 So the result from the PIOPED study have taken into account the number and size of perfusion defects that are seen on a ventilation study and those mismatches are used to categorize this probability. 07:41 So here we have normal ventilation seen on the top two images. 07:48 So these two images here demonstrate normal ventilation. 07:51 You can see that the entire lung parenchyma is homogeneously taken up. 07:55 However, on the bottom images you can actually see that there is a large defect in profusion. Right here where the arrow is pointing. 08:06 So when we normally do a VQ scan, the ventilation and the profusion should match. 08:10 In this situation, they don't and so this mismatch indicates a high probability of a pulmonary embolism.
About the Lecture
The lecture Nuclear Medicine: HIDA and VQ Scan by Hetal Verma, MD is from the course Introduction to Imaging. It contains the following chapters:
- Nuclear Medicine Imaging and HIDA Scan
- VQ Scan
Included Quiz Questions
What is NOT seen in a normal HIDA scan?
- Stomach
- Intrahepatic bile ducts
- Duodenum
- Gallbladder
- Liver outline
Which among the following regarding nuclear medicine imaging is NOT true?
- A radiopharmaceutical is a naturally composed stable element that releases radiation as it decays into an unstable form.
- Nuclear imaging is functional imaging.
- Gamma decay is the energy emitted in the form of electromagnetic radiation from an unstable nucleus.
- Gamma camera is a specially designed camera that measures and forms an image.
- Nuclear images can be static or dynamic.
Which radioisotope is used in cholescintigraphy?
- Technetium-99m
- Iridium-192
- Molybdenum-99
- Thallium- 201
- Gadolinium-223
A 45-year-old female is brought to the emergency room with a painful abdomen after a heavy meal. A HIDA scan was ordered to confirm the diagnosis of acute cholecystitis. What is the finding in acute cholecystitis?
- No radiotracer is seen in the gall bladder.
- The radiotracer is not seen in the duodenum.
- The radiotracer is seen in the transverse colon after 60 minutes.
- The radiotracer is seen in the gall bladder immediately.
- The radiotracer is not seen in the intrahepatic bile ducts.
Which of the following is FALSE about the VQ scan?
- The radioisotope used for perfusion is Iridium-221.
- V/Q scan is used to detect pulmonary embolism.
- It is done when CT pulmonary angiogram is contraindicated.
- A prior chest radiograph must be performed before doing a V/Q scan.
- The perfusion is performed by injecting Macroaggregated albumin intravenously.
Author of lecture Nuclear Medicine: HIDA and VQ Scan

Hetal Verma, MD
Customer reviews
5,0 of 5 stars
| 5 Stars |
|
1 |
| 4 Stars |
|
0 |
| 3 Stars |
|
0 |
| 2 Stars |
|
0 |
| 1 Star |
|
0 |
I love it this video has helped me to understand some concepts
